History of changes / enhancements to the station
May 31 2003
At the point in time of this writing, the station is made, but I don't have
experience with it yet. That said, it might very well be that I have to do
significant changes to the setup which of course I will present here.
Up to now the station underwent a test with all tanks filled with water to:
Needless to say that both tests gave good results, so after finishing these pages I will fill in the chemicals and do the first tests. I will report the results here as they arrive.
June 1st 2003
I changed the voltage regulator for the PCB motor motion - well, aparently
it did not helped too much. Have to organize a better cooling plate for it.
I also created an aditional plastic fork to avoid contaminating the expensive
paladium bath (bath #4). I then ran a test with the heaters on to see if
they can reach the requiered temperature and if all goes well. I created
a little MPEG video during this test. You can see it here: Movie of water
test
June 2nd 2003
Meanwhile I do have the voltage regulator under control. The chemistry is
now also prepared (wow, THAT was a tedious work!!). It's amazing how hot
demineralized water can get if sulphuric acid is added... That was really
a bit scary. Anyways, I took my time - it lasted ~1 hour to just apply it
- and the bath got hot up to 90 degrees celsius (194 degrees farenheit)!
Well, the copper bath must first be initialized with a dummy PCB for 3 hours
before the last indegrient can be applied. I should have read the chemical
manuals beforehand :)
I'm more than glad now that the chemistry is ready - well, after these 3 hours - and that I can do my first tests. But wait, it's 3:20 am now over here and hence this test will happen tomorrow (well after a break to get some sleep). Even PBC freaks like me need some sleep every now and then.
June 4th 2003
Well, it turned out that Adam Seychell was right (thank you Adam) with his
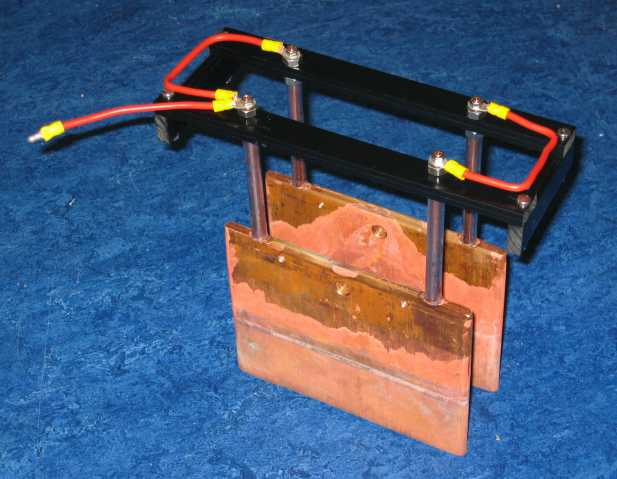
critics about the anode plate setup. I therefore changed the whole anode
frame completely.
You can see the new anodes here:
Here you can see them put in place into the box
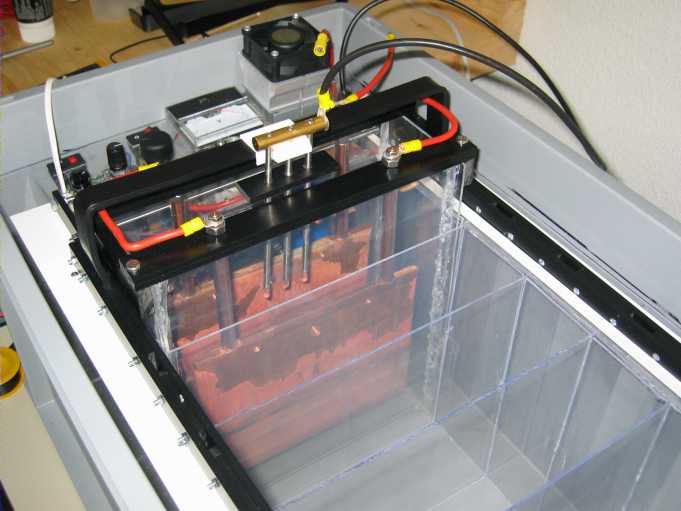
I must say I'm very pleased with the result of this change. The advantage now is that the anodes are completely flodded. There is no longer a problem with the air / liquid interface. Another bonus now is that the bars are made of plastic too. That is there is nothing anymore that could corrode. The screws and nuts are made of stainless steel which is not prone to corrosion if only spils of the liquid get in touch with them. I also added a plug into the anode current wire so as I can more easily remove the whole anode frame if the need arises.
Another problem I had to solve was that the tank holding the elektrolytic fluid started to leak once the solution was in it. It turned out that my aproach of being able to disasemble the station quickly is a good one. That is it was easy to take all other containes out, put the liquid into a temporary tank, fix the leak and reasemble the station.
I'm now operating the station for 2 hours as per instruction of the supplier of the chemicals used. I will later on document what I know about the chemistry used and the steps made by the station etc. I just now want to get to the point where I have my first PCB in my hands...
June 5th 2003
Ok, The first PCB is in my hands. Here it is:
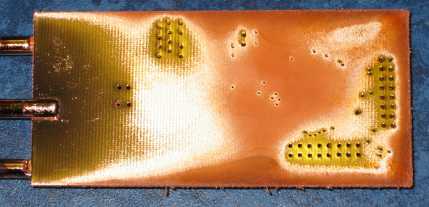
And the other side
I'm of course not happy with this result. IMHO the reason is that I had to run the process at around 13 Amps whereas this little PCB's limitt would have been at around 6 Amps. Well, looks like I have to get the Powersupply problem sorted out. It's still a promissing result though, and for my first PCB it's probably also ok.
June 7th 2003
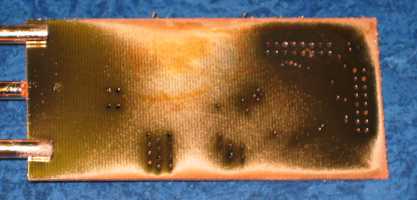
All is OK! See the pictures of the same PCB but this time it's perfect!
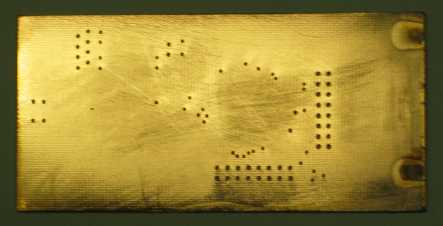
And the other side
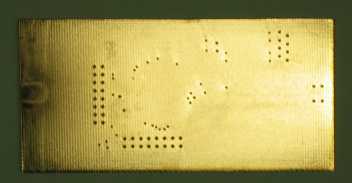
Note! The "black" areas are not at all black. These are just reflections of the light in my office. It's VERY hard to make a good picture of such a shiny object like a freshly through plated PCB! The scratches you see on one side are not related to the through hole process. They were in the print before the process. (That is I made them after drilling the holes to get rid of the material that was arond the borders of the holes). I'm a happy man!
The success came by adding two power diodes in series to the cathode thereby rasing the voltage by ~3V. This has something to do with the triac dimmer I'm using. As a consequence I will - insted of using a ready built one - build my own. I intend to make the station as easy to copy as possible. I now start to document the station so as those intrested in building their own don't have to go through such a lot of difficulties as I had. That said I will add two new sections to the menue. First one will be "Chemistry" where I will list in detail what I know about the chemistry I use. The second section will be instructions, picutres sizes bill of material etc. so as one can build his own station.
It's late again and hence that's all for today folks!
Comments:
| file: /Techref/pcb/plating/tps-operation.htm, 6KB, , updated: 2014/10/17 15:13, local time: 2025/10/10 23:57,
216.73.216.155,10-3-165-151:LOG IN
|
| ©2025 These pages are served without commercial sponsorship. (No popup ads, etc...).Bandwidth abuse increases hosting cost forcing sponsorship or shutdown. This server aggressively defends against automated copying for any reason including offline viewing, duplication, etc... Please respect this requirement and DO NOT RIP THIS SITE. Questions? <A HREF="http://www.ecomorder.com/techref/pcb/plating/tps-operation.htm"> Homebrew Through Hole PCB Plating Station - Updates and Operation</A> |
| Did you find what you needed? |
Welcome to ecomorder.com! |
|
Ashley Roll has put together a really nice little unit here. Leave off the MAX232 and keep these handy for the few times you need true RS232! |
.